




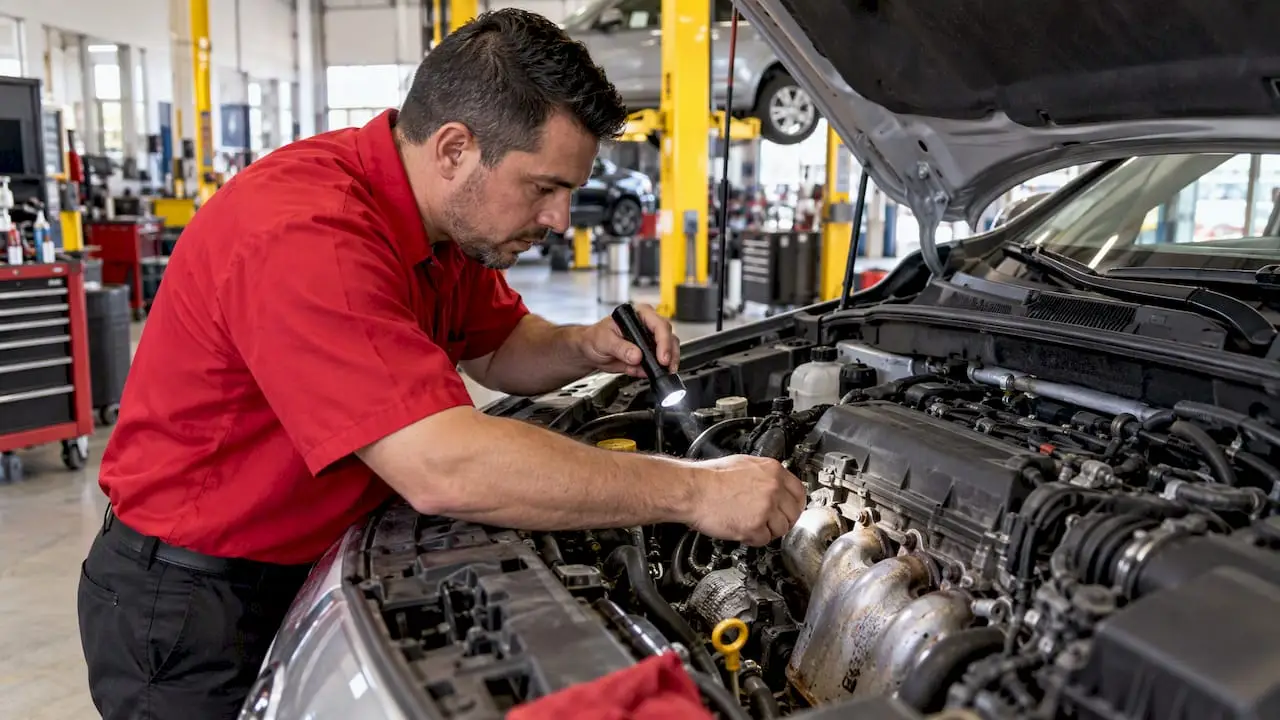
If exhaust fumes can reach the cabin, treat the leak as an urgent safety issue: stop driving and arrange inspection or towing. If the only symptom is a light ticking on cold start with no smell inside the car, plan a same-day inspection rather than waiting. The type of failure, whether it’s a worn gasket, a cracked manifold, or broken studs, determines how much work and cost the repair involves.
TL;DR:
- Most exhaust manifold leaks produce ticking sounds at cold start, often fading as the engine warms, with some leaks causing a metallic hiss or popping during acceleration.
- Visible soot trails, black streaks, and cracks near flange seals frequently indicate leaks, and symptoms like exhaust odor or smoke inside the cabin demand immediate inspection due to safety risks.
- Diagnosis involves visual checks, listening tests with hoses, soap pressure tests, and smoke testing, with scan codes providing additional clues but not definitive proof.
- Repair options range from re-torquing bolts and gasket replacement to stud extraction or manifold replacement, with costs significantly affected by hardware rust, access difficulty, and vehicle-specific procedures.
- Driving with cabin exhaust fumes or CO symptoms risks poison exposure, so any odor or dizziness requires stopping and seeking professional inspection before further driving.
Table of Contents
- Symptoms that point to an exhaust manifold leak
- How to diagnose a leak: DIY checks and shop-level tests
- Common causes and where leaks typically start
- Repair options, what drives cost, and when to call a shop
- DIY gasket replacement: a safe, high-level walkthrough
- Carbon monoxide risk and when to stop driving immediately
- What a manifold leak does to emissions and your legal exposure
- What happens if you keep driving on a manifold leak
- Preventing exhaust manifold leaks before they start
- Why an inspection-first approach matters more than a guess
- Getting your exhaust checked without the guesswork
- Sources
- FAQ
Symptoms that point to an exhaust manifold leak
A manifold leak rarely stays quiet for long. Most drivers notice it through sound first: a ticking or tapping that’s loudest right after starting the engine cold, sometimes fading as the metal warms and expands. A metallic hiss or popping under acceleration is another common tell, especially when the leak sits near a flange or gasket surface.
Visual clues back up what you hear. Soot trails, black streaks, or small holes near the manifold flanges and heat shields often mark where exhaust gas is escaping before it reaches the rest of the system.
The symptoms that matter most are the ones you can smell or feel:
- Any detectable exhaust odor inside the cabin warrants prompt attention due to potential safety risks.
- Visible smoke from under the hood needs immediate attention.
- Rough idle, a misfire-like stumble, or a drop in fuel economy can all trace back to a manifold leak affecting how the engine reads exhaust gas.
- A check engine light with codes tied to oxygen sensor readings or EGR flow sometimes points to a leak upstream.
Leaks that reach the passenger compartment carry real health risk: carbon monoxide from vehicle exhaust is colorless and odorless, and public-health guidance on CO and vehicles specifically warns that a quiet leak routing fumes into the cabin can be more dangerous than one that’s loud but stays outside. A partner resource on exhaust leak symptoms offers a similar rundown of early warning signs worth knowing.
How to diagnose a leak: DIY checks and shop-level tests
Diagnosis works best as a sequence, starting simple and escalating only if the source stays hidden.
- Visual inspection first. Look for soot streaks, missing or loose clamps, and visible cracks in the manifold casting itself.
- Listening test. With the engine running and cool enough to work near safely, hold one end of a length of hose near suspected leak points and the other near your ear. This isolates sound to a specific joint rather than guessing from cabin noise.
- Soapy-water or pressure test. Shops often apply a soap solution to suspected joints while introducing low air pressure, generally in the 5 to 8 psi range according to service procedures for checking exhaust leaks, and watch for bubbles forming at the leak.
- Smoke test when the source stays hidden. Shops rely on smoke testing for leaks that don’t reveal themselves through sound or soap, since smoke can find its way through gaps too small to hear.
- OBD-II scan for supporting codes. Codes like P0402 or P0421 can appear alongside exhaust leaks in some applications, according to the same service diagnostic guidance, though they don’t confirm a manifold leak on their own.
A few habits make the next step easier, whether that’s a DIY repair or a shop visit:
- Photograph soot patterns, cracks, and hardware condition before disassembly.
- Note when the sound appears (cold start, under load, at idle) since timing narrows down the likely cause.
- Save scan tool readouts if you pull codes, since a shop can use them alongside a physical inspection.
Our diagnostics page covers how we approach OBD-II scanning and leak testing if you’d rather have a second set of eyes confirm what you’re seeing.
Common causes and where leaks typically start
Exhaust manifold leaks trace back to a handful of recurring mechanical problems, and knowing which one you’re dealing with changes the whole repair plan.
- Gasket buckling from heat cycling is common and often the only culprit, especially on engines with a history of overheating or frequent short trips.
- Cracked or warped manifolds show up more on cast iron manifolds that have seen years of thermal stress, corrosion, or an overheating event.
- Broken, backed-out, or seized studs can both cause a leak and make a proper repair harder, since a gasket can’t seal evenly against uneven clamping pressure. OEM stud replacement guidance for certain heavy-duty applications shows how stud failure can lead to full manifold warpage requiring more than a simple fastener swap.
- Slip joint or turbo gooseneck leaks further down the exhaust path sometimes get mistaken for manifold-to-head leaks, particularly on turbocharged and diesel applications. A partner guide on EGR cooler failure symptoms walks through how these joints can mimic a manifold leak on diesel trucks.
Soot tracking alone isn’t always proof of a head-to-manifold leak, either. OEM service documentation on exhaust system conditions notes that some intermittent cold-start leakage at slip joints is normal on certain platforms and doesn’t call for manifold or gasket replacement without confirming the actual source first.
Repair options, what drives cost, and when to call a shop
The right repair depends entirely on what’s actually failed, and that’s something a physical inspection confirms rather than a guess from symptoms alone.
- Re-torquing sometimes resolves a leak if bolts simply worked loose without damaging the gasket.
- Gasket replacement is the most common fix when the manifold itself is straight and the studs are intact.
- Stud extraction and replacement becomes necessary when fasteners are broken, seized, or backed out, and this step alone can add significant labor time on rusted hardware.
- Manifold replacement is called for when the casting is cracked or warped beyond what a new gasket can compensate for.
- Welding can serve as a temporary or limited fix on certain crack locations, but it’s not a substitute for replacement on a manifold that’s structurally compromised.
Cost varies for reasons that have nothing to do with the part itself. Rusted or seized hardware can turn a one-hour gasket job into a half-day extraction project. Engine access matters too: some layouts put the manifold in easy reach, while others require removing other components first. A partner breakdown of what makes certain car repairs expensive touches on how labor and access, not just parts, drive final pricing on jobs like this. Vehicle-specific procedures add another layer: some manufacturers call for replacing the manifold, heat shield, and related hardware together rather than piecemeal, as outlined in OEM stud replacement procedures for certain applications.
Pro Tip: If you smell exhaust in the cabin at any point during diagnosis, stop and have the vehicle inspected before doing anything else, since that symptom overrides every other consideration.
Call a shop rather than continuing DIY work when you’re dealing with cabin fumes, broken studs that won’t come out cleanly, evidence of a cracked manifold, or a job that needs specialty extraction tools and exact torque specs you don’t have on hand. A reliable estimate follows a physical inspection every time. Quoting a price before seeing the actual hardware condition, rust level, and manifold state isn’t something a shop can do responsibly.
DIY gasket replacement: a safe, high-level walkthrough
Gasket replacement is one of the more approachable exhaust repairs for an experienced DIYer, provided the studs cooperate and access isn’t blocked by other components.
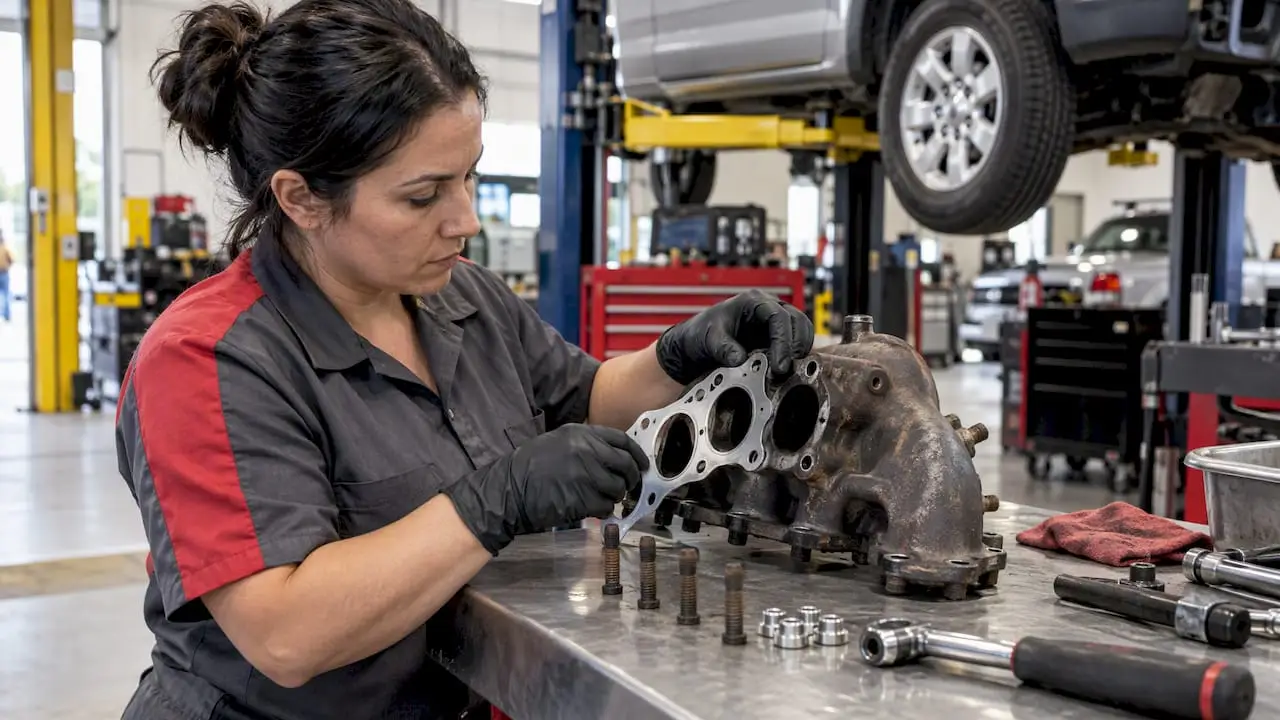
Preparation and safety come first. Work outdoors or in a well-ventilated space, never in a closed garage. Let the engine cool completely before touching the manifold, since exhaust components hold heat long after shutdown. Disconnect the battery if the job requires moving wiring harnesses or sensors near the manifold.
Tools and parts to have ready:
- Socket set and breaker bar
- Torque wrench rated for the fastener specs
- Penetrating oil for seized hardware
- Stud extractor set as a backup
- New gasket and matching hardware kit
The general sequence:
- Remove any components blocking access, such as heat shields, sensors, or brackets.
- Apply penetrating oil to fasteners and let it soak before attempting removal.
- Remove manifold bolts or nuts carefully, working in small increments to avoid snapping a stud.
- Inspect the manifold and head mating surfaces for warping, pitting, or cracks once the old gasket is off.
- Install the new gasket and hardware, then torque fasteners to the manufacturer’s spec in the correct sequence.
- Reassemble heat shields and any components removed earlier.
- Verify the repair with a soapy-water test or smoke test before considering the job finished.
Pro Tip: Torque fasteners in the sequence and stages your service manual specifies rather than tightening one bolt fully before moving to the next, since uneven torque is a common cause of early gasket failure.
The most common complication is a snapped stud, which turns a straightforward gasket swap into an extraction job requiring specialty tools. Tight clearances on some engines also force partial disassembly just to reach the manifold. Welding a crack yourself isn’t advised unless you have the right equipment and experience, since a poor weld can fail again quickly under heat cycling.
After the repair, drive the vehicle through a full heat cycle and recheck for new soot marks or any hint of exhaust odor in the cabin. That follow-up check is what confirms the fix actually held.
Carbon monoxide risk and when to stop driving immediately
Carbon monoxide is colorless and odorless, which means the smell of exhaust isn’t a reliable early warning. Public-health guidance on CO exposure from vehicle exhaust advises treating any cabin odor as a serious warning sign rather than waiting for symptoms to confirm it.
Watch for:
- Headache, nausea, or dizziness while driving
- Drowsiness or confusion that doesn’t match how you were feeling before the drive
- Symptoms that ease once you’re outside the vehicle and return once you get back in
If anyone in the vehicle shows these symptoms, shut the engine off, get everyone out into fresh air, and arrange a tow rather than driving further. Never run or repair a vehicle in an enclosed or partially enclosed space, a rule that public-health guidance repeats specifically because CO can build up quickly indoors. Investigations into CO-related incidents, including a CDC report on carbon monoxide poisoning tied to vehicle defects, have linked fatal outcomes to exhaust defects that let fumes into enclosed cabins, which is exactly why prompt repair matters more than convenience here.
What a manifold leak does to emissions and your legal exposure
An exhaust manifold sits upstream of the sensors and emissions components that manage how cleanly your engine runs. A leak there can throw off oxygen sensor readings, which in turn affects how the engine computer adjusts the fuel mixture, often resulting in higher tailpipe emissions than the vehicle was designed to produce.
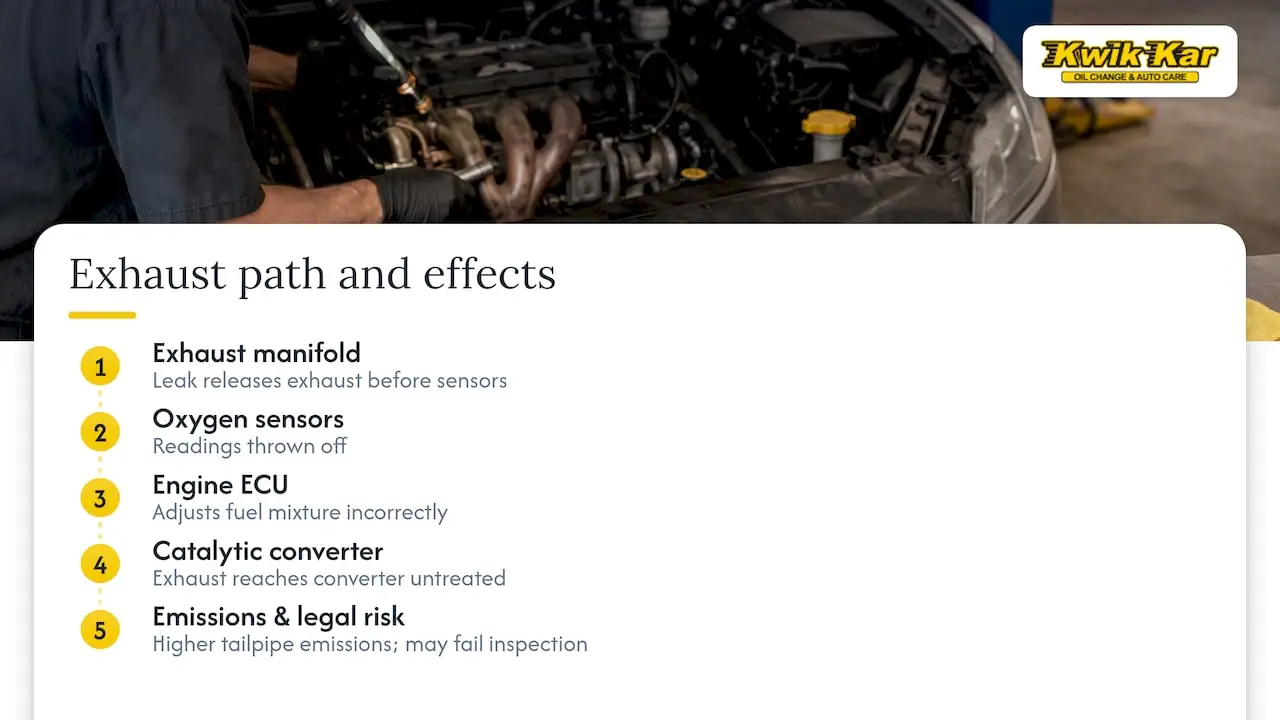
Many regions require vehicles to pass an emissions or safety inspection to stay legally registered, and a manifold leak can be enough to fail that inspection depending on where the leak sits and how it affects sensor readings. Beyond the paperwork, a leaking manifold is also releasing exhaust gas earlier in the system than intended, before it reaches the catalytic converter and other emissions controls that are designed to treat it.
The practical takeaway isn’t about chasing a specific number. It’s that a manifold leak works against every emissions control built into the vehicle downstream of it, and fixing the leak is part of keeping those systems doing their job. If your vehicle is due for a state inspection, it’s worth having the exhaust checked beforehand rather than finding out at the inspection station.
What happens if you keep driving on a manifold leak
Ignoring a manifold leak doesn’t just mean living with a ticking sound. Over time, the same disrupted airflow that throws off sensor readings can also affect fuel economy, since the engine computer is working with inaccurate exhaust data to manage the fuel mixture.
A leak that starts small tends not to stay that way. Continued heat cycling, vibration, and exhaust pressure on an already compromised joint or crack often make the problem worse, turning what might have been a gasket replacement into a cracked manifold that needs full replacement. Broken studs left unaddressed can back out further or shear off entirely, complicating a repair that would have been simple earlier on.
There’s also a knock-on effect on nearby components. Exhaust gas escaping near sensors, wiring, or heat shields can accelerate wear on parts that were never designed to be exposed to that heat and gas flow directly. None of this happens overnight, but the direction is consistent: leaks tend to grow, and the repair gets more involved the longer it’s left alone.
Preventing exhaust manifold leaks before they start
Manifold leaks are largely a function of heat cycling and time, so prevention is less about a single fix and more about consistent habits.
Routine inspection during regular maintenance visits is the simplest prevention tool available, since a technician can spot early soot tracking or loose hardware before it turns into a full leak. Addressing minor exhaust noises early, rather than waiting for them to get louder, also tends to catch gasket wear while a simple replacement is still the only repair needed.
Avoiding habits that stress the exhaust system unnecessarily helps too: frequent short trips that never let the engine fully warm and cool in a stable cycle can accelerate gasket wear over time. If you’ve had overheating issues in the past, it’s worth having the manifold and gasket checked specifically, since that kind of heat stress is a known factor in warping and cracking.
Our exhaust system repair page covers what a routine exhaust inspection includes if you’d like to build it into your regular maintenance schedule.
Why an inspection-first approach matters more than a guess
A ticking sound can mean a $40 part or a $400 repair, and there’s no way to know which without eyes on the actual hardware. That’s the whole case for inspecting before quoting.
Technicians document every inspection with digital photos so you can see exactly what was found, not just take our word for it. Repairs come with a warranty, and estimates follow the inspection, never the other way around. If cabin fumes or CO symptoms are part of your concern, call us before you drive any further.
— Kwik Kar
Getting your exhaust checked without the guesswork
Chasing down a manifold leak on your own has real limits, especially once broken studs, cracked castings, or hidden slip joint leaks enter the picture. That’s where a documented inspection earns its keep: our ASE-certified technicians check the exhaust system and send you real-time photos through our digital vehicle inspection, so you see exactly what’s leaking before any work starts. Every repair is backed by a warranty, and you get a clear price after inspection, not a guess over the phone.

If cabin fumes, a CO-like symptom, or a sound that’s gotten worse have you worried, don’t keep driving on it. Here’s how to get it handled:
- Call us at (903) 712-5945 to describe what you’re hearing or smelling and get next steps.
- Request towing instead of driving if anyone in the vehicle has felt dizzy, nauseous, or short of breath.
- Book a diagnostic visit through our auto repair services page and let our team confirm the source before any parts get ordered.
We serve drivers in Van Alstyne and nearby communities, with after-hours drop-off and local rides if you need to leave the car with us for the day.
Sources
- CERTAIN 2011-2012 F-450/F-550 SUPER DUTY VEHICLES OVER 14,000 LBS. GVW WITH 6.7L ENGINE — EXHAUST MANIFOLD STUD REPLACEMENT
- Diagnostic tip for checking exhaust system for leaks for L5P engines (service procedure example)
- Carbon monoxide and vehicles (MDHHS safety guidance)
FAQ
Is an exhaust manifold leak serious?
It depends on where the leak routes exhaust gas. A leak that reaches the passenger cabin is serious because carbon monoxide is colorless and odorless, and public-health guidance treats any cabin exhaust odor as an urgent issue. A leak that stays entirely outside the cabin is less urgent but still worth repairing before it worsens.
Is it expensive to fix a manifold leak?
Cost depends entirely on what failed, with gasket replacement generally less expensive than repairs involving broken stud extraction or manifold replacement. Rusted hardware, limited engine access, and vehicle-specific procedures that require replacing the manifold along with heat shields and related hardware can all add labor time. A shop can only give an accurate number after a physical inspection.
Can I drive my car with a manifold leak?
If you smell exhaust inside the cabin or anyone feels dizzy, nauseous, or gets a headache while driving, stop and arrange a tow rather than continuing to drive. If the only symptom is a light ticking at cold start with no cabin odor, a same-day inspection is still the safer move, but the vehicle isn’t necessarily an immediate emergency.
What does a leaking exhaust manifold sound like?
Most manifold leaks produce a ticking or tapping sound that’s loudest right at cold start and often fades as the engine warms up. Some leaks instead sound like a metallic hiss or a popping noise, especially under acceleration when exhaust pressure increases at the leak point.
Have questions about a noise or smell you’re noticing? Call Kwik Kar of Van Alstyne at (903) 712-5945, or stop by for a courtesy look before it turns into a bigger repair.