




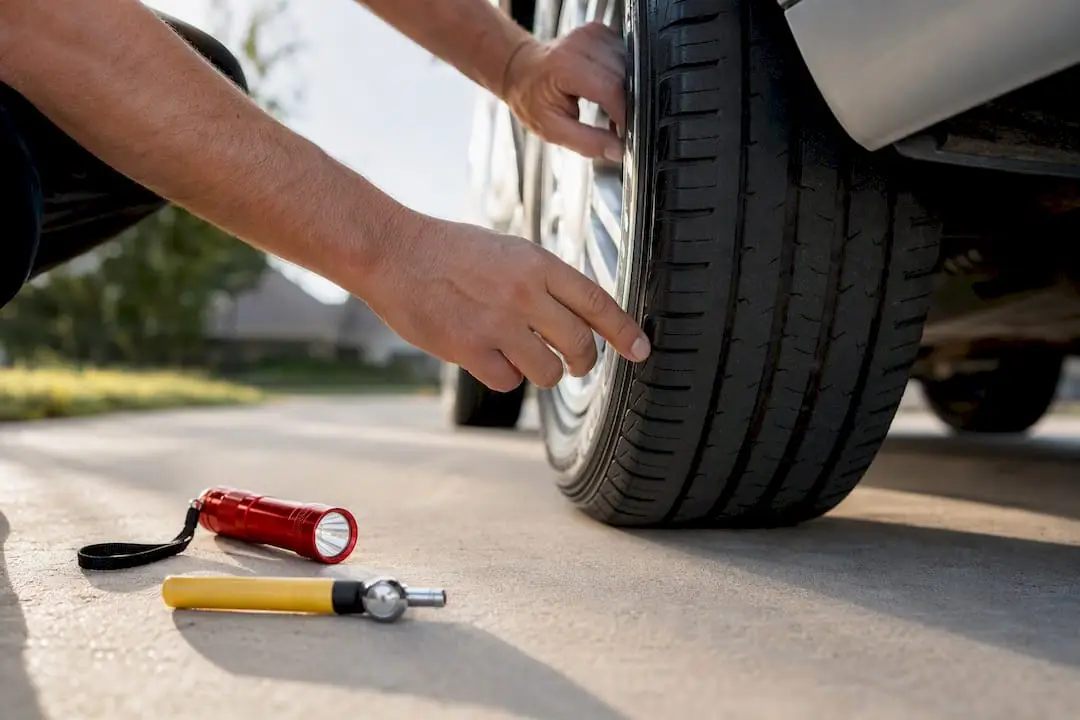
Yes, inspect your car before any long road trip. Prioritize tires, brakes, fluids, battery, lights, and your emergency kit first, since those six areas cause most roadside breakdowns. If your vehicle shows warning lights, unusual noises, high mileage, or you’re towing a heavy load, get a professional pre-trip inspection instead of relying on a DIY look.
TL;DR:
- Checking tire pressure, tread depth, and wear patterns ensures safety on wet roads, especially before long trips where tire failure is common.
- A professional inspection is crucial if warning lights, fluid issues, or unusual noises are present, or if the vehicle has high mileage or recent purchase history.
- Ensuring all fluids are in proper condition and levels, including coolant, oil, and brake fluid, can prevent leaks and overheating during extended driving.
- Battery condition, exterior lights, and wipers should be tested and maintained to ensure proper visibility and electrical function on the road.
- Maintaining emergency supplies and confirming the presence of a fully inflated spare, jack, and basic tools helps manage roadside problems efficiently.
Table of Contents
- What’s a Fast Pre-Trip Walkaround You Can Do Yourself?
- How Do You Check Tires and Brakes Before a Long Drive?
- What About Fluids, Belts, and Hoses?
- How Do You Check the Battery, Lights, and Wipers?
- What Emergency Kit and Paperwork Should You Pack?
- When Should You Bring Your Car to a Mechanic Before a Trip?
- Why Does the 3-3-3 Rule Matter as Much as the Mechanical Checks?
- A Local Shop’s Take on Pre-Trip Problems
- Ready to Get Your Car Checked Before You Hit the Road?
- Sources
- FAQ
What’s a Fast Pre-Trip Walkaround You Can Do Yourself?
You don’t need an hour or a repair manual to catch the big problems. A consistent, repeatable sequence beats a random glance every time, because it stops you from skipping something important when you’re rushing to load the car.
Here’s the order we recommend:
- Walk the exterior. Check all four tires for low spots, bulges, or embedded debris. Glance at every headlight, taillight, and turn signal lens for cracks. Look under the car for fresh fluid spots on the driveway.
- Pop the hood. Check engine oil level and color on the dipstick, glance at the coolant reservoir, and look at the battery terminals for white or greenish crust.
- Check the cabin. Confirm your registration, insurance card, and spare key are in the car. Turn the key to “on” and watch for warning lamps that stay lit longer than a few seconds.
- Take a short test drive. Brake gently and note any pulsing or grinding. Turn the wheel lock to lock in a parking lot and listen for clicking. Accelerate normally and pay attention to any new noise or vibration.
Pro Tip: Run this exact same sequence every time, even for short weekend trips. Muscle memory catches small changes, like a slightly softer brake pedal, before they become expensive problems on the highway.
How Do You Check Tires and Brakes Before a Long Drive?
Tires and brakes fail more often on road trips than almost anything else, mostly because drivers check them once a year instead of once a month. The fixes are quick, but skipping them is where trouble starts.
- Check pressure cold, before you’ve driven more than a mile, using the number on your driver’s-door placard, not the higher figure printed on the tire’s sidewall. That sidewall number is the tire’s maximum rating, not the recommended pressure for your vehicle, according to NHTSA’s tire safety guidance.
- Run the penny test. Insert a penny into the tread with Lincoln’s head down. If you can see the top of his head, the tread is worn low enough to matter on wet roads.
- Look for uneven wear patterns. Wear concentrated on one edge or in a cupped pattern often points to an alignment or suspension issue rather than simple age.
- Check your spare for the same cold pressure and for dry rot if it’s been sitting for years.
- Listen for brake noise and feel for pulsing through the pedal. Squealing, grinding, or a pedal that sinks toward the floor means booking service before you leave, not after.
What About Fluids, Belts, and Hoses?
Healthy fluid tells you a lot before a warning light ever comes on. Engine oil should look amber to light brown; if it’s black, gritty, or low, plan an oil change before departure. Coolant should be clear and brightly colored, not rusty or milky, since a milky tint can signal a leak into the engine’s oil system.
Brake fluid should sit near the “full” line and look close to clear. Dark, cloudy fluid absorbs moisture over time and can affect braking performance on long descents, which is worth mentioning to your technician if you’re overdue for a flush.
- Squeeze coolant hoses gently; they should feel firm, not soft or crunchy.
- Check belts for cracks, fraying, or a shiny, glazed surface.
- Look under the car overnight for drip spots under the engine or transmission.
Pro Tip: A coolant reservoir that’s low every few weeks isn’t normal, even if the temperature gauge looks fine. Small, repeated topping-off usually means a slow leak that’s easier to fix at home than on the shoulder of an interstate. If you’re due for a broader fluid service, our spring maintenance checklist covers what to change and when.
How Do You Check the Battery, Lights, and Wipers?
Your battery, lights, and visibility gear don’t announce trouble the way a squealing brake does. They just quit, usually at the worst possible moment.
- Batteries typically weaken after several years, so have yours load-tested if it’s in that range or older.
- Clean any white or blue corrosion off the terminals with a wire brush before you go.
- Dimming headlights, slow cranking, or dashboard flickering point to a charging system problem a shop can confirm with a quick voltage test.
- Test every exterior light, including reverse lights and turn signals, with a helper or by watching reflections in a garage door.
- Replace wiper blades that streak or chatter, and top off washer fluid.
- Check the windshield for chips; small ones often spread into cracks on a long, hot drive, and catching them early is far cheaper than a full replacement. Cabin comfort matters too, especially heading into summer heat, so it’s worth a look at getting your AC ready before a long haul.
What Emergency Kit and Paperwork Should You Pack?
A few pounds of gear in your trunk can turn a roadside problem into a 20-minute delay instead of a towed vehicle.
- Verify your spare tire is inflated and the jack and lug wrench are actually in the car, not left in the garage.
- Pack jumper cables or a portable jump starter, a flashlight, a basic toolkit, and a reflective triangle or flares.
- Carry your registration, insurance card, roadside assistance number, and a spare key.
- Bring water, a first-aid kit, a phone charger, and a tire pressure gauge.
Ready recommends keeping supplies like these stocked year round, not just before a trip.
When Should You Bring Your Car to a Mechanic Before a Trip?
Some things a driveway inspection simply can’t catch. Warning lights, grinding brakes, coolant leaks, or a battery that fails a load test all call for a trained technician, not a guess.
A shop visit typically includes a computer scan for stored codes, a look at the underbody and suspension from a lift, precise brake pad measurement, and a proper battery load test. This is the kind of check a pre-trip inspection covers in one visit. That underbody view matters, since a lift-based inspection catches leaks and worn suspension parts that a visual walkaround from ground level misses entirely, according to a used-car road trip checklist from VinspectorAI.
At Kwik Kar of Van Alstyne, that inspection is handled by ASE-certified technicians, and you get a Digital Vehicle Inspection with real-time photos, so you can see exactly what’s found rather than take someone’s word for it. Every repair carries a 2-year/24,000-mile warranty.
- Get a pro inspection before towing a trailer or heavy cargo.
- Get one if the car is high mileage or newly purchased and its history is uncertain.
- Get one before any single-day drive over five or six hours.
Pro Tip: If you’re driving a diesel truck or RV for a tow-heavy trip, keep an eye on your DEF levels too. This fleet operator’s guide to DEF refills covers what to watch for on the road.
Why Does the 3-3-3 Rule Matter as Much as the Mechanical Checks?
Driver fatigue causes more preventable crashes than most mechanical failures, which is why trip pacing deserves the same attention as your tires. The 3-3-3 rule suggests driving about 300 miles a day, stopping to arrive by 3 p.m., and staying three nights once you land, according to Islands’ breakdown of the rule. A common add-on: stop every three hours to stretch and reset your focus. SlashGear’s explainer frames it the same way, tying shorter daily mileage to fewer fatigue-related mistakes. Rotate drivers when you can, and schedule your car’s service a few days before a heavy single-day drive, not the morning of.

A Local Shop’s Take on Pre-Trip Problems
Most of the breakdowns we see before road trips trace back to the same four things: a weak battery, an underinflated tire, worn brake pads, or a small coolant leak nobody noticed yet. A short inspection catches nearly all of it. With after-hours drop-off and Digital Vehicle Inspections, you can get answers on your schedule and be back on the road with confidence, not guesswork.
— Kwik Kar
Ready to Get Your Car Checked Before You Hit the Road?
Skip the guesswork and let ASE-certified technicians confirm your car is ready, not just hope it is. Kwik Kar of Van Alstyne’s pre-trip inspection covers the same ground this checklist walks through: tires, brakes, fluids, battery, belts, hoses, and every light, backed by a Digital Vehicle Inspection with real-time photos so you see exactly what’s found before any work begins.

Every repair is backed by a 2-year/24,000-mile warranty, and with after-hours drop-off and free local rides, fitting this in around a busy pre-trip schedule is easy. Whether you’re heading out from Van Alstyne, Anna, Howe, Melissa, or Gunter, book your pre-trip inspection online or call (903) 712-5945 to schedule a time that works before you load the car and go.
Sources
- Ready
- NHTSA — Tires
- Islands — What the 3-3-3 road trip rule means
- SlashGear — What is the 3-3-3 rule for road trips/RVs
FAQ
What Are the 7 Steps for a Pre-Trip Inspection?
A solid sequence covers tires, lights, fluids, belts and hoses, battery terminals, brakes, and a final check of wipers and documents. Following the same order every time, like the walkaround above, keeps you from skipping a step under time pressure.
What Is the 3-3-3 Rule for a Road Trip?
It means driving about 300 miles a day, stopping to arrive at your destination by 3 p.m., and staying three nights once you get there, with many drivers also stopping every three hours to stretch, according to Islands.
What Vehicles Require a Pre-Trip Inspection?
Any vehicle heading into a long drive benefits from one, but it matters most for towing setups, high-mileage vehicles, and recently purchased used cars with an uncertain maintenance history.
How Often Should I Check Tire Pressure Before a Trip?
Check tire pressure cold, before driving, using the figure listed on your driver’s-door placard rather than the tire sidewall, ideally a day or two before departure so you have time to fix any issue.
Is It Worth Getting a Professional Inspection Instead of Doing It Myself?
A DIY walkaround catches many issues, but a shop visit adds a computer diagnostic scan, a lift-based underbody check, and precise brake and battery testing that a visual check at home can’t replicate. For towing, high mileage, or long single-day drives, a professional pre-trip inspection is the safer call.